
End of Abyss Fractured Being: Final Boss Strategy (Both Phases)
Fractured Being final boss guide: phase 1 melee, grab and gravity attacks, phase 2 tendrils and shockwave — plus the stagger trick that trivializes its pull.

The Fractured Being is what the whole descent was building to — a two-phase final boss in the Neural Chamber that fuses everything the facility threw at you: melee pressure, area denial, and a gravity gimmick with a specific counter. We rate it 5 of 5 on our difficulty scale: an endgame gate that chains multiple mechanics with heavy punishment for sloppy rolls.
Before you enter
Two things to do in the room before the arena — they save runs:
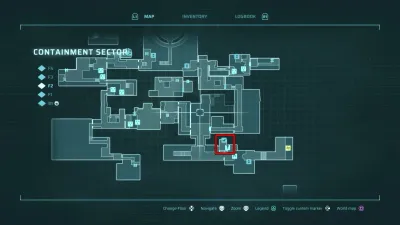
- Open the door on the right of the triangle-marked room — it’s a shortcut to the safe room, so a failed attempt costs seconds, not a trek.
- If you want both endings on this save, check your Data Shards. Killing the boss with all eight Data Shards already delivered rolls the secret ending — and permanently locks out the normal ending’s trophy on this save. If this is your first clear, don’t deliver the set yet; beat it normally, deliver afterward, and re-fight. The endings guide explains the fork.
Phase 1: The melee gauntlet
Phase 1 is a close-range duel — slams, swipes, a radial shockwave, a grab, and the signature gravity pull.
- Slams and swipes — telegraphed arm raises; roll through, not backward, and you’ll land inside its recovery.
- Shockwave — a radial burst around the boss. The tell is a crouch-and-charge; back off early or time the roll.
- Grab — a lunging hold that costs a chunk of health. It comes out fast at close range; keep mid-distance when it’s not attacking.
- Gravity attack — it begins dragging you toward it. A Riot Breaker blast staggers it out of the pull — the single most important interaction in the fight. Save shells for this.
Phase 2: Ranged pressure
At roughly half health it mutates — ranged tendril strikes join the kit, and the shockwave widens.
- Tendrils — targeted strikes that track briefly. The tell is a ground ripple under your feet; keep moving and they whiff. Standing still to fire is how they land.
- Expanded shockwave — same crouch tell, bigger ring. This is the phase’s real check: respect it even when you’re mid-combo.
- Punish windows — post-shockwave recovery and the moments after a tendril volley are your safe damage windows. The Security Rifle and Incinerator both sustain pressure through them; the charged Pulse Gun shot is the free-ammo punish.
General strategy
- Fight at mid-range. Close invites the grab; far lets tendrils track you while you can’t answer.
- Roll through, not away. Every melee string is safer inside its recovery than at the edge of its reach.
- Route the fight. If you’re dying in phase 2, the answer usually isn’t more damage — it’s earlier rolls on the widened shockwave. The safe-room shortcut makes attempts cheap; use them.
After it falls
Victory rolls the credits — and sends you back into the facility with shuttles live for cleanup: the three optional bosses, the remaining Data Shards, and the last weapons in the arsenal all stay open. Full route to this room: walkthrough part 6.
Related Articles
End of Abyss Data Shards: All 8 Locations & the Secret Ending
All 8 Data Shard locations in End of Abyss — the keys, tools and burnable walls behind each, and how they unlock the secret ending at the Mainframe.
Last updated Oct 5
End of Abyss Suit Mods: All 10 Mods, 8 Vaults & 6 Energy Cells
Every suit mod, vault, and Energy Cell in End of Abyss — where all 10 mods and 8 Vault Keys are, plus the 6 Energy Cells that unlock extra mod slots.
Last updated Oct 5

End of Abyss Walkthrough: Full Story Path, Bosses, and Key Items
Complete End of Abyss walkthrough: the critical story path from the Outer Sector to the Neural Chamber, every boss, key item, and SCU in order.
Last updated Oct 5
Was this helpful?
Thanks for the feedback!